Judge me if you will, but I could listen to Christmas music year round. Now, to be fair, I only listen to a certain number of Christmas albums that I love more than any others, so it's not like I have Frosty the Snowman on repeat. (God, Buddha, Allah, Yoda and whoever else forbid.)
I mention this only to clarify the name I gave this applesauce. Its moniker is the name of Sting's album of winter/Christmas folk songs. The applesauce is heavily spiced, and as it cooks, the kitchen fills with the scent of the same spices used to make wassail, a ye olde Christmas grown-up beverage. It comes highly recommended by yours truly for Yuletide.
(I also happened to have the album on repeat while I was making the applesauce, but the previous sounded more elegant.)
So here's the thing about making applesauce: there are too many variations.
Skins, no skins. Sweetened, unsweetened. Spiced, unspiced. Chunky, smooth. There's quite a few ways to customize your homemade applesauce, so what you're going to see here is my favorite version.
I
As a warning to you who NEED a recipe to cook: I have no real recipe for applesauce. It's one of those things I kind of eyeball and decide when it's right.
Step One: Buy lots of apples
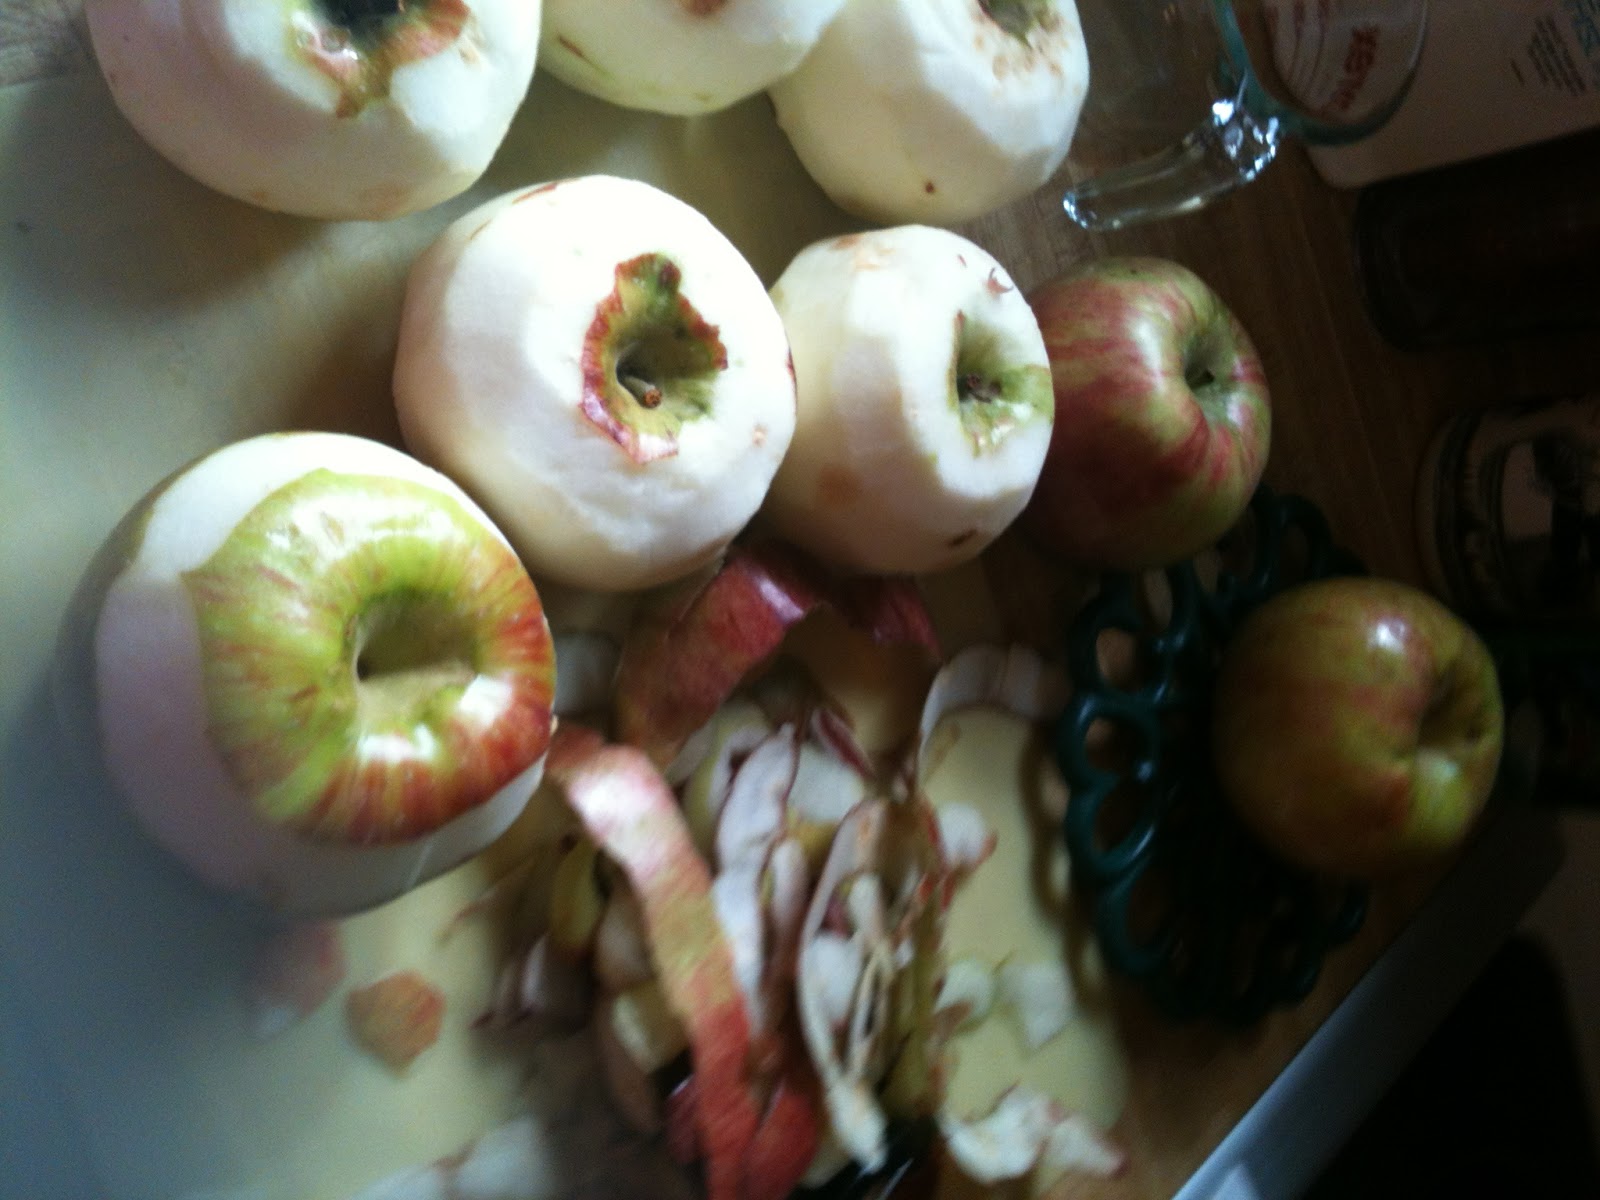 Several pounds ought to do it. I bought mine from a farm up the street. I asked the farmer for recommendations, and ended up with a whole bunch of Jonathans. (If you don't have a farmer to make recommendations, here is an article.) Bear in mind that these apples will cook down by at least half, so if it feels like you bought too many, it's probably just right. The picture to the right is about half of what I bought.
 Step Two: Prep your apples
This is about as hands-on as making applesauce gets. There is a whole lot of prep work required. Apples can (but not must!) be peeled, cored and chopped before they can be cooked.
 If you leave the skins on the apples, it will add some more fiber and a rosy color to the sauce. You can also opt to peel half and leave the other half in the skin. I generally peel them all, although it really depends on how much effort I feel like putting into things that day. Peeling apples, particularly that many, is time-consuming.
 Next, core your apples. I highly recommend investing in an apple corer or a corer/slicer. Otherwise, you're stuck cutting around the core, and you can lose some of the apple doing that. Pay particular attention to getting the seeds out. As most people know, they can make you very sick.
Finally, chop those puppies. If you have a corer/slicer, this will be easier, as the apples will already be cut into wedges. Chop them as small as you can so you don't wind up with large apple chunks in your final puree.
If it's your first time making applesauce, I advise prepping only a few apples at a time. By doing this, you can see how many cups of apple you end up with as you chop them. That way, you can stop chopping and reserve any extra apples if you bought too many.
Put your apple chunks in the pot and....
Step Three: Start cooking!

Get the pot boiling. This may take a while, depending on how many apples you chopped. While you're done the bulk of the hands-on work, you need to watch your applesauce as it cooks. Reduce the heat after it has been boiling for a few minutes.
This is where I add my spices. Generally, I include cinnamon, allspice, ground cloves and ginger. Occasionally I'll add nutmeg as well. I rarely use equal amounts of all of the spices, opting instead to add quite a bit of cinnamon and clove and less of the other spices. Usually, I taste the mess a few times until I hit the sweet spot. Haha bad pun.
You can also choose to add sweetness here as well, by mixing in brown sugar, white sugar, stevia, honey or agave as you prefer. Again, I don't usually add sweetener, so you're on your own to experiment with this. Sorry, guys.
Step Four: Keep cooking, and mash, mash, mash

I generally puree my apples by alternately smashing them with a potato masher and stirring them with a slotted spoon. I have on occasion finished the process by pureeing the cooked apples in the blender until very smooth.
Step Five: Cool!
Before putting your applesauce in a container, let it cool thoroughly. If you put it in a plastic container and cover it too soon after pulling it off the burner, condensate will build in the tub and you risk it becoming a breeding ground for bacteria and mold.
Step Six: Use
Now it's time to serve your sauce. This can be eaten straight, of course, but it can also be used for baking or mixed into your morning oatmeal.

Mangia, my pretties!
BB
No comments:
Post a Comment